Becoming the eyes of the pathologist in surgical pathology
Why a Gross Description Matters
As a pathologists’ assistant, your gross description is how a pathologist will “see” a specimen. Before they ever look down a microscope, they’re relying on your written words and sampling choices to understand what the surgeon sent and what deserves their attention.
The difference between a good and bad gross is more than just written aesthetics. A good gross tells the pathologist what the lab received, what is important and what they’re seeing on their slides. It’s designed and catered to the end user: the pathologist. Compared to a bad gross which is difficult to read and isn’t structured with the pathologist in mind. Important findings can be hidden in a wall of superfluous text that can be painful and distracting to read through.
A Simple, Reliable Structure for Gross Descriptions
The following five-step or five paragraph approach is based on a style called the Raymond Paragraph System. This lays out a way to structure the gross description in a clear, logical and easy to read manner.
1. Identify the Specimen Elements
Every gross should identify the patient, specimen label and how the specimen was received (i.e. fresh/in formalin). From there, identify what organ or tissue you received, its size (in three dimensions), weight (if applicable) and what orientation was provided (e.g. short superior, long lateral; or unoriented if the specimen cannot be oriented).
Eliminating phrases like “weighing” or “measuring” and placing these items within () allows the gross to be more streamlined. It also makes information easier for the reader to extract when looking over your report.
Examples:
- Received fresh in a container labeled “Bob Smith” and “left breast lump” is a breast lumpectomy (44g, 8.1 x 5.5 x 4.8 cm) with sutures marking short superior and long lateral.
- Received fresh in a container labeled “Bob Smith” and “total thyroid” is total thyroidectomy (28 g) consisting of left lobe (4.4 cm SI x 2.3 cm ML x 2.0 cm AP), isthmus (1.5 cm ML x 0.6 cm AP x 1.1 cm SI) and right lobe (5.2 cm SI x 2.1 cm ML x 2.2 cm AP) with a suture marking the left superior pole
- The specimen was received in formalin with the patient name Bob Smith in a container labeled “gallbladder”. The specimen consists of an intact gallbladder (8.5 x 3.2 x 2.8 cm).
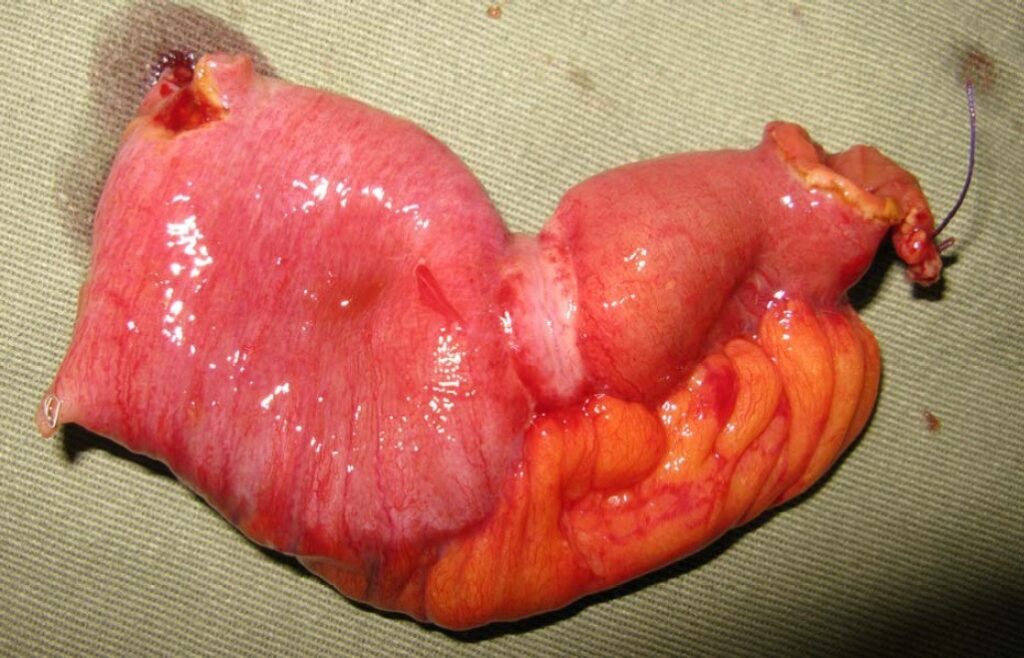
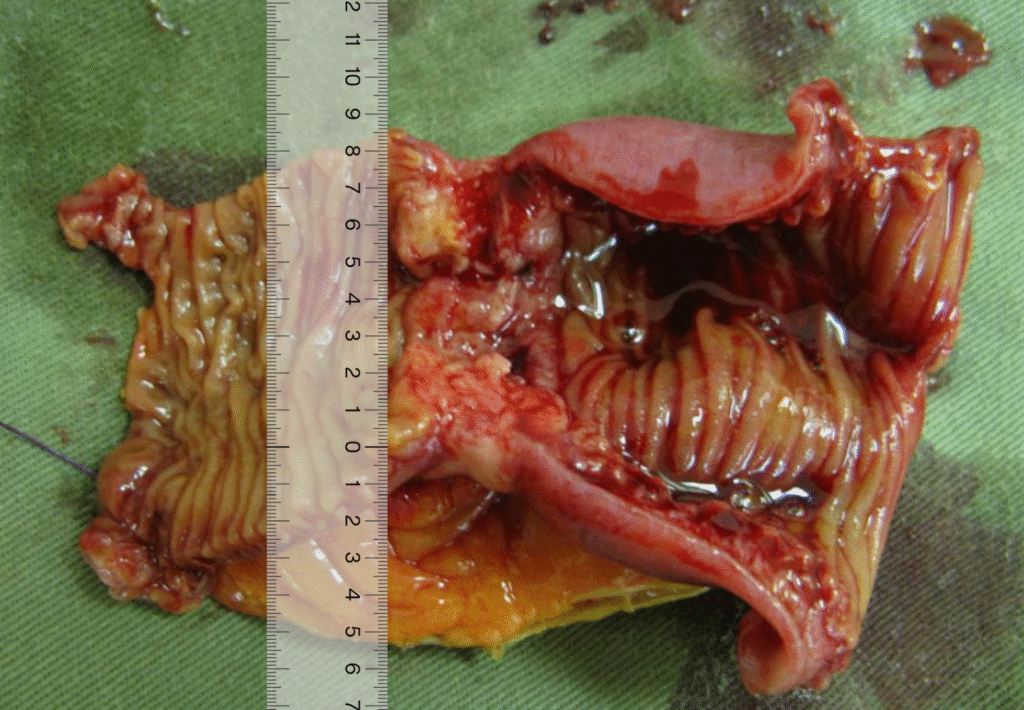
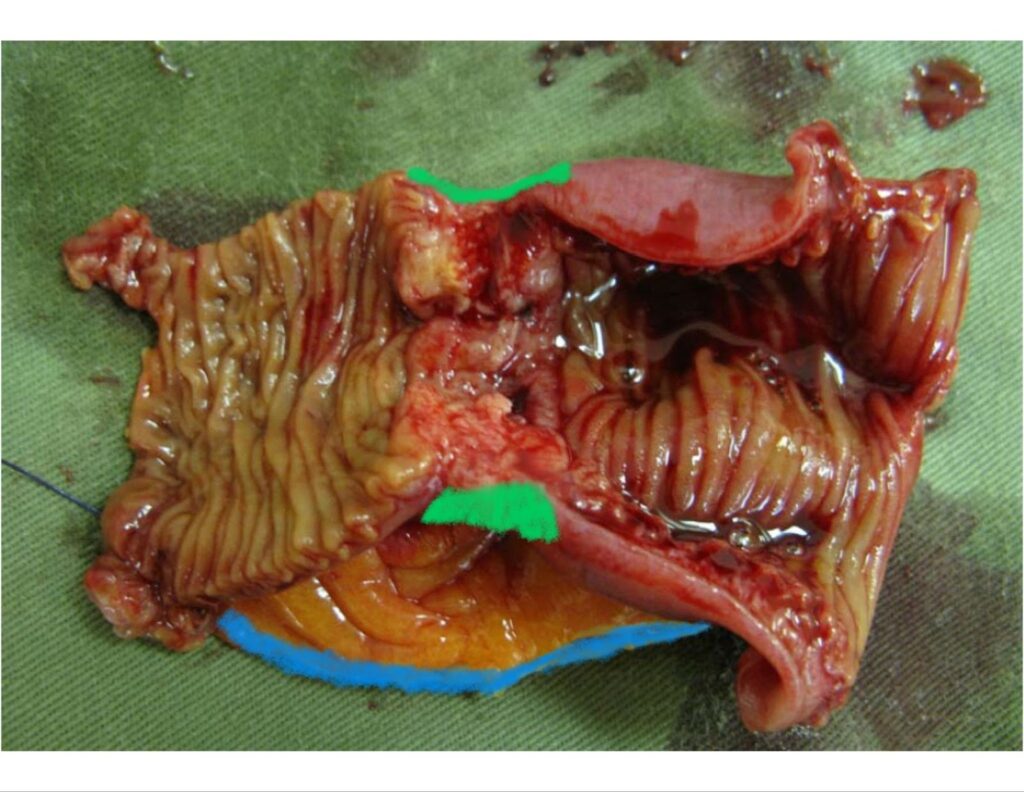
Gross pathology of small intestinal adenocarcinoma, serosal view. Xilin Wu1, Hester Y. S. Cheung, Cliff C. C. Chung, Michael K. W. Li, CC BY 4.0 <https://creativecommons.org/licenses/by/4.0>, via Wikimedia Commons
For this piece of bowel, the first paragraph of your gross description would be:
Received fresh, with the patient name “Bob Smith” and in a container labeled “small intestine” is segment of small bowel (22.5 cm in length with an open circumference of 7.5 cm at the proximal margin and 3.5 cm in open circumference at the distal margin) with mesenteric fat extending 4.2 cm with a suture marking distal.
2. Primary Pathology
The primary pathology = why the specimen was taken out or the main problem that’s affecting the tissue. Often this is something like cancer but tissue can also be removed for other abnormalities (e.g. if it’s infected, has lost its blood supply for some reason or is dying/dead etc).
This is where you become the eyes of the pathologist. You are looking for abnormalities and features of the primary pathology including:
- Appearance/color (tan, hemorrhagic, dusky, gangrenous)
- Texture/consistency (soft vs firm vs hard; gritty)
- Shape (well/poorly circumscribed, polypoid, exophytic, ulcerative)
- Size (dimensions)
- Extent of tissue involvement (focal vs diffuse; what exactly is involved or invaded through)
- Distance to the margins/other anatomical landmarks
Often the primary pathology will be supported by the clinical information provided by the surgeon (e.g. a solitary tumor in a breast removed for breast cancer), although this is not always the case (e.g. a solitary tumor in a breast removed for a reduction).
Some of these features you will be able to identify without cutting the tissue but some you can only see after sectioning. Some may also be specific to certain disease processes, some of them may be directly used to stage the disease and some can even indicate if the entire disease was removed (e.g. distance to the margins).
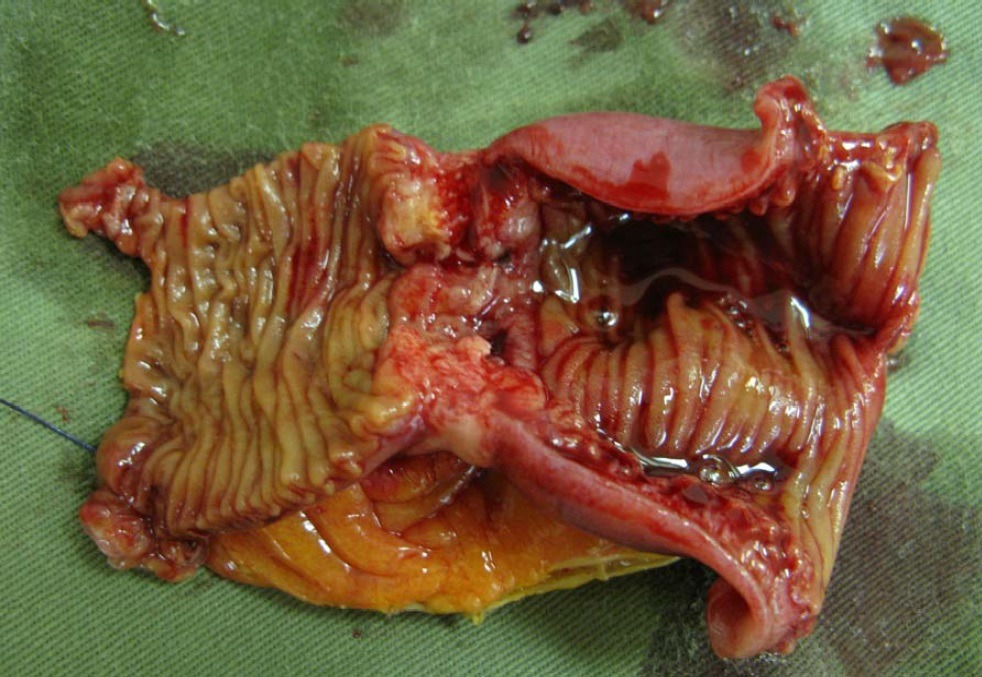
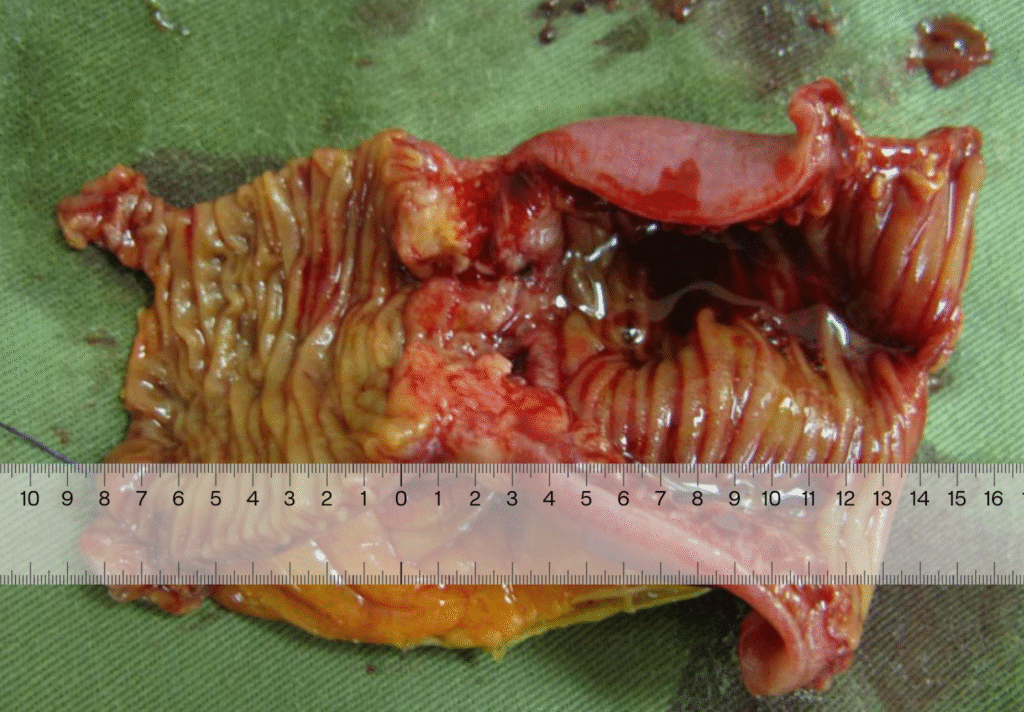
Gross pathology of small intestinal adenocarcinoma, luminal view. Xilin Wu1, Hester Y. S. Cheung, Cliff C. C. Chung, Michael K. W. Li, CC BY 4.0 <https://creativecommons.org/licenses/by/4.0>, via Wikimedia Commons
Taking into account the first paragraph, what the specimen looked like before opening and after, as well as sectioning, the next paragraph would sound like:
An area of white/tan serosal puckering is identified at the midpoint of the bowel. Opening reveals a circumferential, obstructive, tan tumor (4.7 cm in length x 7.8 cm transverse x 1.2 cm in thickness) which comes to within 8.1 cm of the proximal margin and 7.8 cm of the distal margin. The tumor is consistent with the area of serosal puckering and causes a stricture in which the lumen open circumference is 7.5 cm proximal to tumor, narrowing to 2.5 cm in open circumference for a length of 2.5 cm and reopening to 3.5 cm in open circumference distal to the tumor. Tumor invades through the muscularis into mesenteric fat, coming to within 3.8 cm of the mesenteric margin and 0.1 cm of the serosal surface.
3. Secondary Pathology/Incidental Findings
At this point, the primary pathology (tumor in this example) has been described and all relevant information regarding it has been given. Now is the time to turn your attention to the remainder of the tissue and describe secondary pathology or incidental findings. These findings could be related to the primary pathology (e.g. lymph nodes) or unrelated (e.g. perforated appendix or diverticuli in a colon cancer specimen).
When no secondary pathology is present, this is where you will also describe other information related to the specimen but unrelated to the primary pathology which can include things like:
- Whether tissue is taken for tumor bank/research
- If photographs are taken
- Any special studies performed. (e.g. flow cytometry or microbiology)
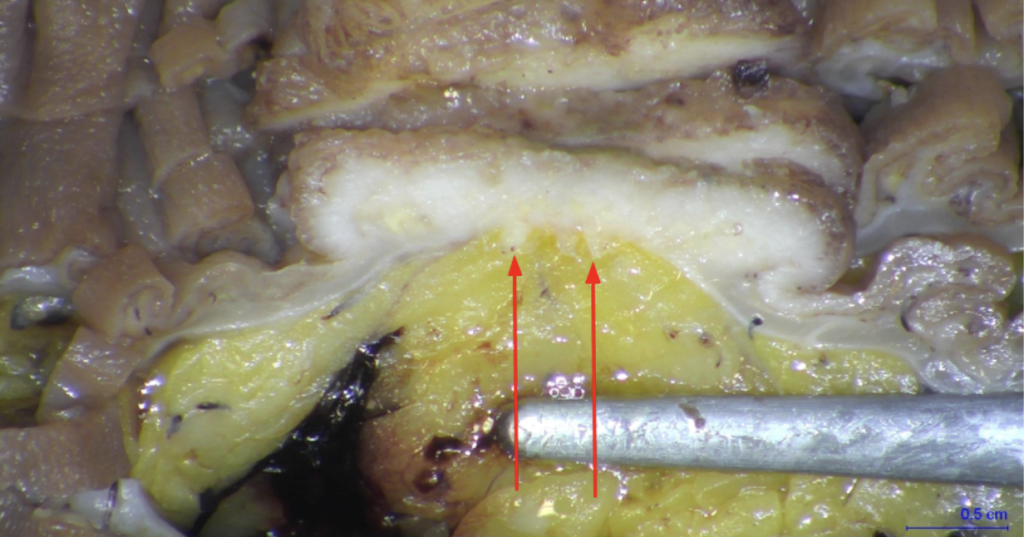
In this case, we can document our lymph node dissection:
14 possible lymph nodes are identified which range in size from 0.3-0.8 cm greatest dimension.
4. Ink Code
Next, indicate the inking code used for the case. Based on how information is read (ie from left to right) and the way we process information, it is useful to place the color first, followed by what it represents. To make reading easier, place each color on its own line.
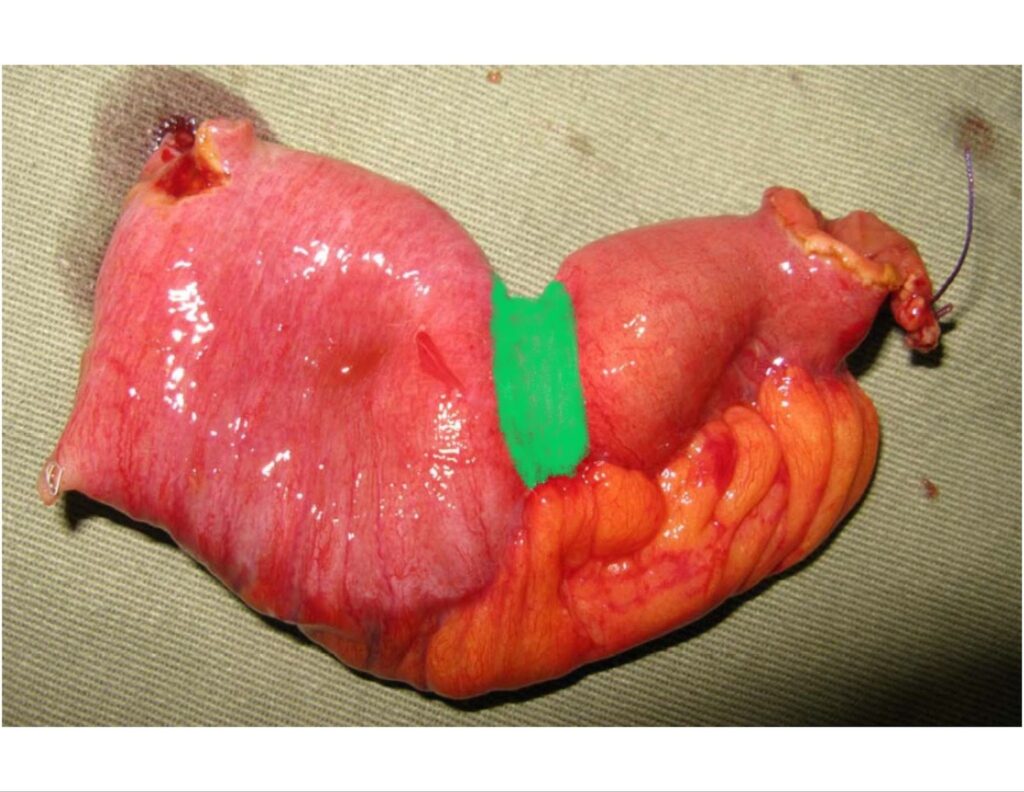
For this bowel specimen we’re looking at, it would be:
Ink code:
Blue – mesenteric margin
Green – serosa overlying tumor
5. Block Description
Use a format similar to the ink code – first indicate the cassette number, followed by what is contained within the cassette. Do not place your block/cassette designation within the body of the gross description.
It is also helpful to indicate whether representative sections are submitted or if the specimen has been submitted entirely. Stating this upfront makes it clear to the pathologist whether or not they can request more tissue be submitted if they need to go back to the case. Similarly, even if a specimen isn’t submitted entirely, it is helpful to indicate if subsets of the specimen are submitted entirely (e.g. if the tumor was entirely submitted, even if the whole specimen wasn’t).
This should be efficiently laid out for the pathologist to look through but alsos include enough information so that the pathologist can fully interpret what you are trying to demonstrate. The block description provides information about the type of tissue submitted and, if needed, its relationship to resection margins, adjacent anatomical structures, or closely approximated normal and abnormal tissues.
With larger, complicated specimens, it can be optimal when the section code mirrors the gross description by submitting samples of the primary pathology first, followed by samples of the secondary pathology and finally by random samples of required tissue specific to the site.
This last paragraph should sound like:
Representative sections as follows:
A1-A2. Proximal margin, shave sections
A3-A4. Distal margin, shave sections
A5-A6. Tumor bisected and submitted from proximal to distal, showing tumor extending to serosal surface
A7-A8 Tumor bisected and submitted from proximal to distal, showing invasion into fat
A9-A10. Mesenteric margin closest to tumor
A11-A24. One possible lymph node bisected in each cassette
Practical Tips for Better Gross Descriptions
- Once you are experienced enough to differentiate normal from abnormal tissue, it can be helpful to refer to normal tissue as unremarkable to reduce the amount of text required to describe part of your specimen (e.g. instead of “The left ovary is smooth, firm and yellow-tan with a uniform, cerebriform outer surface” you can use “unremarkable”)
- If you are accustomed to a different style of formatting your gross description, practice re-formatting your gross into this style with some of your previously completed gross descriptions until you are comfortable enough to use this in your practice
- This style is most effective when grossing large, complex cases and is not necessarily applicable for all specimens – GI biopsies and polyps are often grossed with only a few lines of text. Use discretion when implementing this system